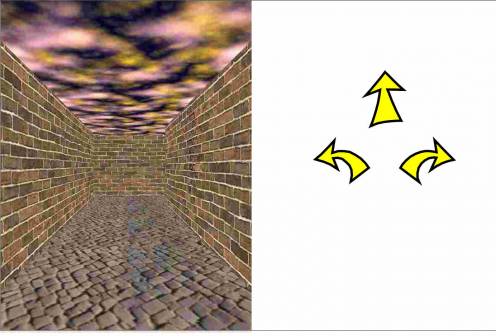
Maze PDF PostScript game
The PDF game is made based on project order http://www.freelancer.com/projects/PHP-C-Programming/postscript-programmer-developer-who-can.html ( and the second description is here – http://www.freelancer.com/projects/PHP-Javascript/InDesign-programmer-needed-redesign.html ).
We have one program that creates all the pages inside one maze*.PDF at once using some proprietary specifications and the GhostScript distiller.
Here we would to explain how the program works and how to create specifications on the example of maze 5×5.
Needed software
GhostScript distiller can be downloaded from http://www.ghostscript.com/download/
After installing the distiller will available for the program by the path – C:\Program Files\gs\gs9.02\bin\gswin32.exe
If it's not so you can also place the file 'gswin32.exe' into the same directory where the main program 'maze.exe' is.
If you want to use another distiller – no problem. The program always generated the file *.ps – the maze in the PostScript 2.0 format. Using any other distiller you can always convert the file into PDF. But note – in you distiller select the 'A6' (4,13” x 5,83”) file format.
The command for GhostScript distiller (if the file has the name 'all_pages.ps'):
C:\Program Files\gs\gs9.02\bin\gswin32.exe" -sDEVICE=pdfwrite -sOutputFile=all_pages.pdf
-sPAPERSIZE=a6 -dBATCH -dNOPAUSE -f all_pages.ps
Maze specification
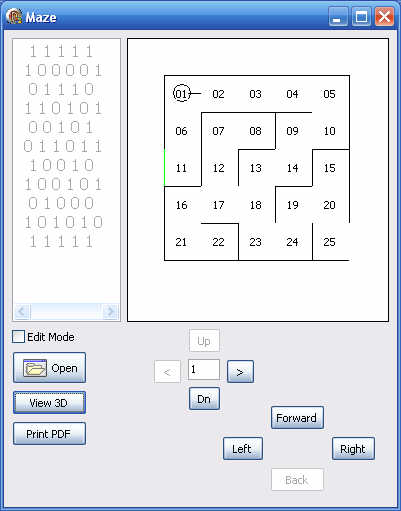
We use the simple text file specifications where every existing wall is marked as '1' and no wall – '0'.
The program assume the maze entrance can be on the left side only, and the exit – on right side of the maze. Therefore user goes from left side to right side through the maze.
Example of specification you can find in the file 'first.txt':
5
0:  1 1 1 1 1 - wall #1
1: 1 0 0 0 0 1 - corridor
2:  0 1 1 1 0 - wall #2
3: 1 1 0 1 0 1 - corridor
4:  0 0 1 0 1 - wall #3
5: 0 1 1 0 1 1 - middle corridor
6:  1 0 0 1 0 - wall #4
7: 1 0 0 1 0 1 - corridor
8:  0 1 0 0 0 - wall #5
9: 1 0 1 0 1 0 - corridor
0:  1 1 1 1 1 - wall #6
Although the program allow to edit the maze specification in the WYSIWIG (“What You See Is What You Get”) mode – it don't save anything. You should copy the lines with '0' and '1' from the maze editor into the text file by hands.
Maze move commands
In the program form it's possible to go inside the maze using buttons 'Up', '<', 'Dn', '>', or 'Left', 'Right', 'Forward', and 'Backward' as well – to see is the specification correct.
Maze PS creation
Click on icon 'open' in the program and open the specification from the current program directory. On successful – it'll open the selected specification.
For example, if the specification has the name 'maze10.txt' – the result will be 'maze10.pdf' (and 'maze10.ps').
Note: The specification file should be in the same directory where the 'maze.exe' file is.
Making PDF
Click on “Make PDF” button to start to create the Maze using OpenGL rendering.
The names of PS/PDF files with the same as the specification filename is (for 'maze1.txt' – will be 'maze1.ps' and 'maze1.pdf').
By default (see also 'settings') the Maze Editor uses the screen to create the pictures. Therefore while the program is rendering the final PDF-file – it's important don't overlap the View3D form by any other forms. The View3D form should be on the top position on the screen.
For low-sized screens
When the screen height is less than 870 pixels (for example 1024 x 768) – the program rotate the resulting image on 90 degrees, render it and in PDf processing turn it back by -90 degrees, repack to PDF-result.
Therefore on small screen resolution the program is working slower by 2-2.5 times.
To improve the speed – possible to decrease the size of the View3D form with help of mouse. Then check the checkbox 'Vertival' and be sure that the image size is enough good for final PDF.
Make Jpeg
This button allow to make a testing screenshot from View3D form. The screen shot is keeping into the program directory on the name 'screenshot.jpg'.
Abort button
Since the “Making PDF” can be long slowly process – during it you can click on “Abort” to cancel it. If you suddently click to it – select “cancel” to continue.
The working files
During PDF making process the program creates the #.jpg files in the “jpeg/” subdirectory. You can check these files instead of PDF-reader, sometimes this way can be quicker.
The file I/O error during PDF-making process
On old computers with slowly hard disk you can got this error becuase the program uses third-party program to convert jpeg into Postscript level 2.0. If the jpeg-ps converting was slowly.
When it's happen the program is stopping for 0.5 seconds. And it shows the message about (message is disappeared automatically after 0.5 seconds).
Don't worry, the program continue the work itself without of any troubles or data broken.
Batch mode
For 3D OpenGL rendering this mode is not working from Maze Release 1.2.
View 3D
After update this is the important part of the program.
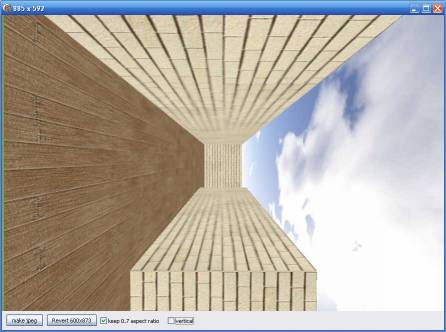
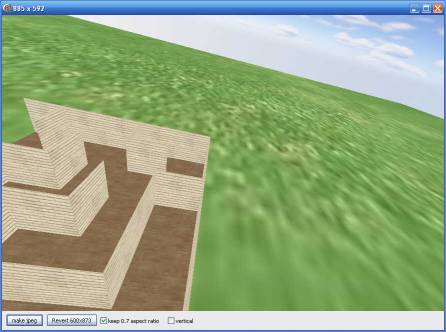
It show an additional form with 3D OpenGL view of a maze. It's possible to resize the form to decrease (or increase) the size of final PDF.
You can click into the 3D view form and drag mouse to change the camera position. Use this way before to make PDF to be sure about all the textures are correct (if you've manipulating with them). Later when you'll click on arrows – the camera will be set into the properly position inside the Maze.
Settings.txt
Special file 'settings.txt' contains the options that are used in the rendering process.
- The jpeg compression ratio
- The rendering scheme: 0 – use software rendering (is working very slow), 1 – use graphic videocard (default variant)
The example of the file
80 //the jpeg compression ratio
1  //0 -- make software screenshots or 1 -- use opengl videocard (quicker but needed screen from 1024x600)
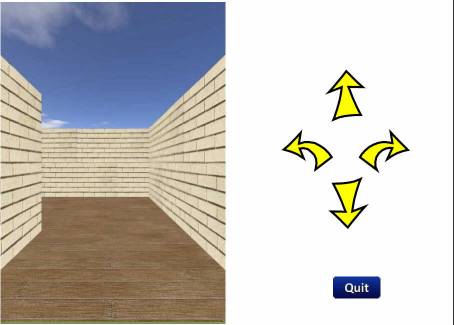
Final PDF file
Innosetup installer
The program has own installer as the “maze_editor_setup.exe”. It's allow to install the software quick and use it immediantly after download.
One important note: To use it in Windows 7 / Windows Vista or Windows R2008 Server – needed to install it onto the simple path like “C:/Maze_editor/” instead of program files. It's because the program writes files into their directory. And in recent windows this way is restricted by security police.
Update 2-mar-2012
Requirements
- The Maze should be compiled as a picture, better format – jpeg
- Every face inside the Maze should support bitmap textures too
- The program should have simple settings file for better tune
The maze rendering with textures
Changes are – now the Maze is rendered by OpenGL-based (GLScene) engine.
Every face has a type, you can assign several textures for known face type. There are
- Wall
- Floor
- Sky
- Grass
The subdirectory “Textures” is in the same directory where the “Maze.exe” program is.
There are subdirectories
- wall
- floor
- grass
Every of these directories contain at least one texture. You can change any of them and remake the PDf maze again.
If you want to have different walls inside the maze – you can place several texture files into the 'wall' directory, and the program will use them in the random mode.
Special notes for skybox. There are 5 texture files:
- east.jpg
- north.jpg
- south.jpg
- top.jpg
- west.jpg
The names should be not changed. You can upload other files but assign only those names for them to have the program be workings.
